VEED.io what is it?

When you want to edit videos, the first software that you probably think of would most likely be adobe premiere or Sony Vegas (if people still use that) or some other software that you might have to pay for. Sure the “good” ones cost money but if you’re just a beginner or just wanna casually make vids then there are free software out there for you to use. But which one?

A web based editor

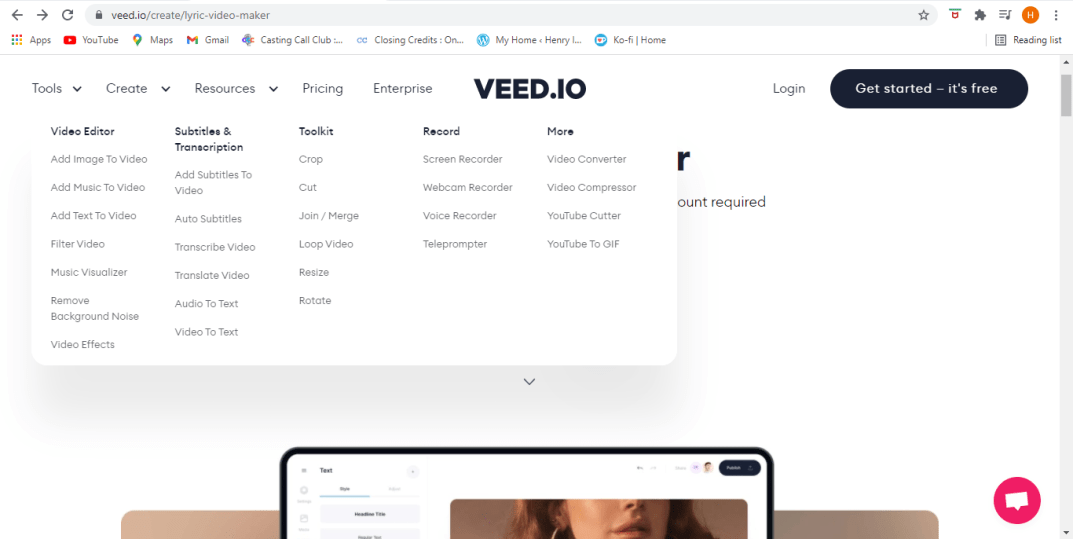
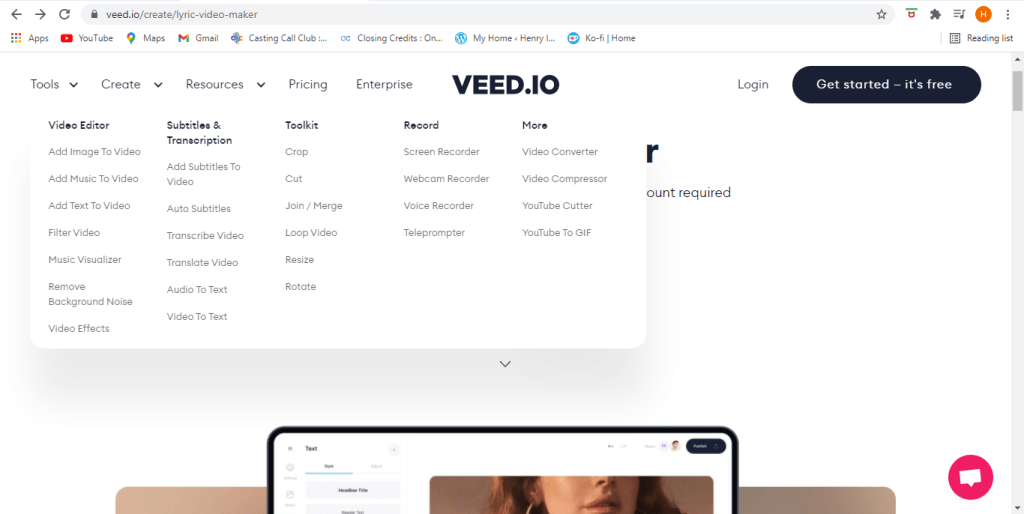
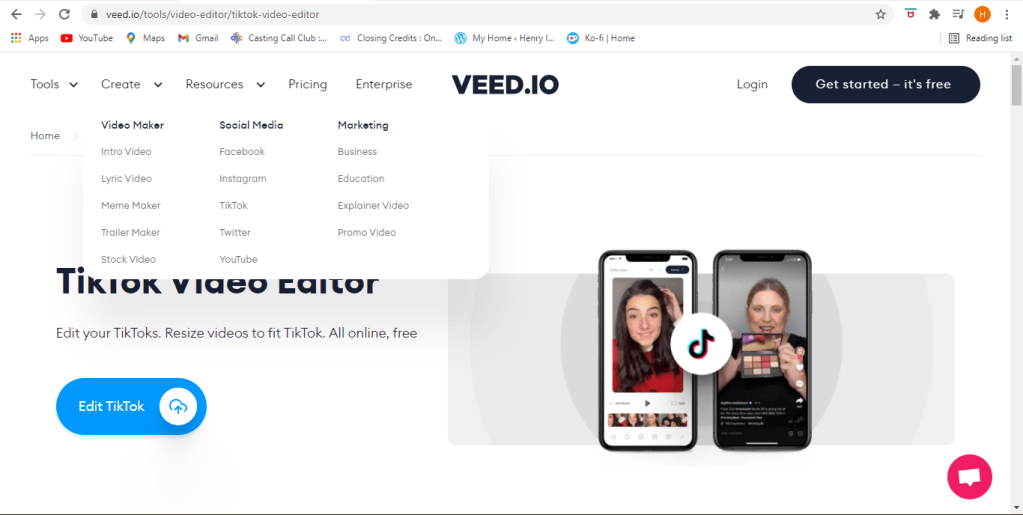
You can probably search up free video editing software and get a bunch of nice results, but what if these complicated programs take a huge toll on your PC’s operating system since you have to install them? Well don’t worry about that because we got VEED.io. This is a web based editor that you can use to create and edit videos.

Tools

This site can offer a variety of tools that can help you get started in editing. From cropping to adding subtitles to filters to even translation you can put whatever you want in it.

Editing

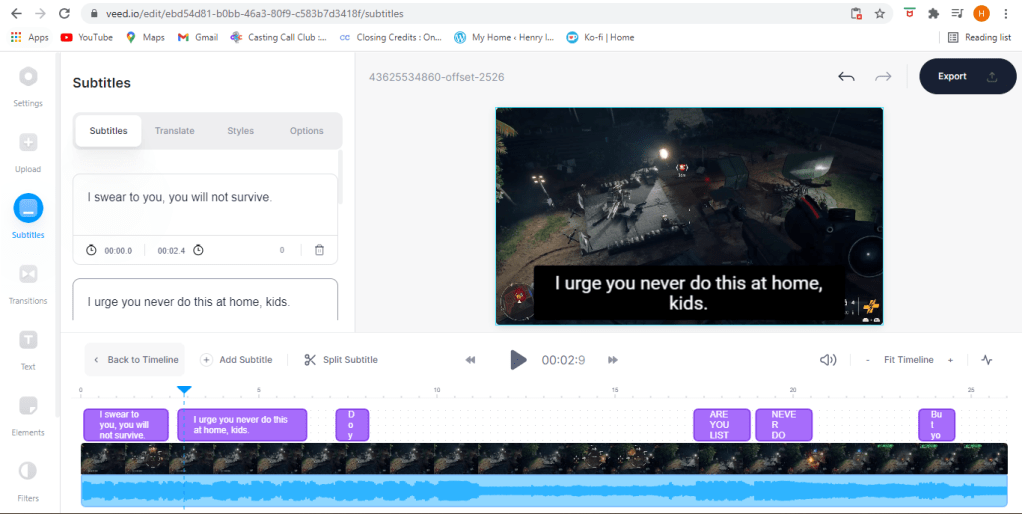
When you add subtitles you might say somethings that it might not entirely understand. Which is why you get the ability to edit them yourself. Now you can articulate spamming your keyboard with what’s going on (har).

Removing Audio

Muting

In case you want to remove audio from your video, you can do that. You can mute your audio completely, replace the audio, clean it up (if you have the basic plan), and a bunch o’ other things. To learn more you can check out this link here.

Text

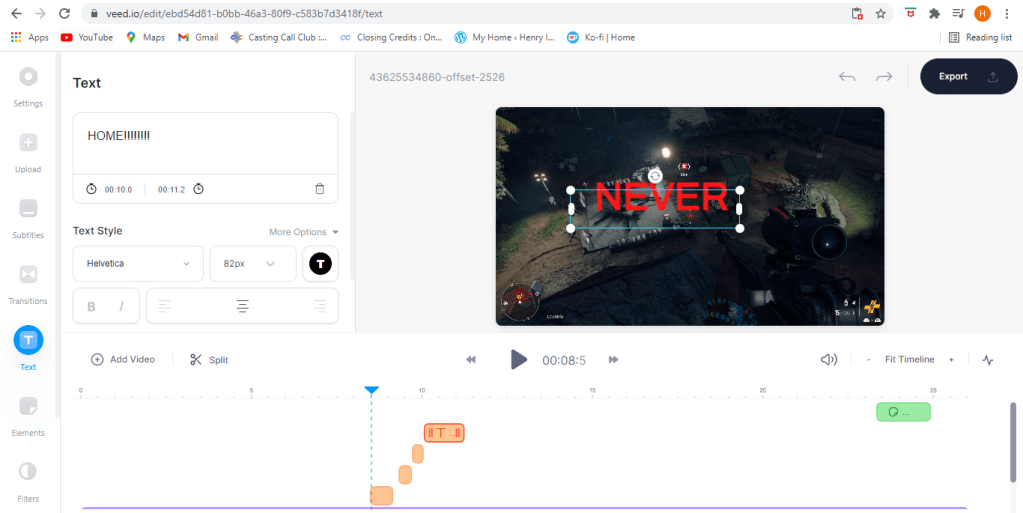
If you just want to add text then just add text.

Posting

Post where ever

With this site you can post your dance video to Tik Tok or upload your gameplay footage to Youtube, Twitter, Facebook, or whatever other site that gets you clout.

Membership

Of course there’s alot more you can do if you sign up. Of course you can create a free account and do anything and save your videos, and if you pay for a membership but you can always simply try it first and get one later so should you choose.

Lets get started

Well what are you still doing here? You saw the footage, I told you how it works, so lets get to makin’ videos.

The journey

Keep up the hunt (by: me)

I’m going to talk about the things I’ve learned about in the past, and how it can shape the future. When I started learning how to use the software I had bare basic knowledge on how these software’s work, but now I feel like I now know how these programs are supposed to work. However that doesn’t mean that I’m an expert on all of them nor do I like them all. In fact some of these programs I tend not to use. Here’s some of the adobe programs I’ve used before.

  1. Dreamweaver: For this program you need to know how to code HTML, CSS, or Java Script to create webpages. In code the HTML is the skeleton, the entire body, without the HTML there is no website. Why I don’t really like this is because for some reason when I save web pages and close the program I can’t open it back up because for some reason the HTML portion will not save. Everything else will save but the website itself. I looked google for why it does that but I couldn’t fix it for some reason. But of course I still managed to find a way to save it… until I lost it again (DANG).
  2. Animate: Animate is a good program for animations and creating web banners, but the thing about me is I don’t have a drawing tablet so drawing is really hard for me on this program.
  3. Illustrator: My teacher felt the same way about this when he first started using it, and now he can’t stop using it. Illustrator is a vector based graphic program that works to draw images. When I first started using it I wasn’t good at drawing with the pen tool but with time I might get there.
  4. Premiere: Used to edit videos. Adobe After effects can do this too and a lot more, but this program I was actually able to export it and upload to youtube.
  5. Photoshop: Of course this will be my most used program out of all the programs. This program is used to edit photos and even videos (to an extent). I use it even in my spare time when I just feel like making nice things.

The journeys end?

Is this the end of my learning journey? Of course not. There’s always room for more improvement, more development so long as you exist on this planet. I took an acting course a year ago and I said this during that class as well. Your character will keep developing and evolving.

Quote from my past experience

EVEN TOUGH THE SEASON IS OVER, THE SHOW ISN’T

Stock footage and how to use it.

If you need footage for your videos and you are low on time or funds, you can use these things called stock footage. Stocks are free media that you can use for any project you are working on from videos to images. However a thing to note is that even though it’s free that doesn’t mean you can just do anything you want with it. What everyone should know about anything involving creative media is something called a creative commons licence.

What is a Creative Commons license?

I’ve talked about fair use in the past, but now we’re going to talk about it for when it comes to stock media. According to creativecommons.org The “CC” license forges a balance inside the traditional “all rights reserved” that the copyright laws create, but of course you should give credit to the original creators and provide details of any changes made.

Stock media sites

Lets talk about the sites you can find them on.

  • Pexels.com is a site which can provide free images and footage. If you are familiar with the site unsplash.com, then it should seem familiar.
  • Pixbay.com is another site that offers free footage and images, and it also offers free vectors.
  • Mixit.co is yet another site you can use for stock footage and images.
  • Dareful.com is another site that can provide “some” free 4K resolution stocks, but not all are free. You must also provide credit to the creator and a link to the license and also indicate if any changes were made to the creators footage.
  • Videvo.net is one more site we will talk about. This site offers some free footage and it can also provide details on the kind of licenses that come with each footage.

Once again some stocks are free, but other footage must be either paid for or require a subscription. Sometimes you can even donate to some of these creators to show appreciation.

That’s most of what you should know for when it comes to using stock footage and how it’s really supposed to be used. It’s best to use your own footage of course, but if you need it these are few of the best places to get some. Now once again get out there and get to creating.

More about Multimedia

Let’s talk more about the multimedia teams, mainly the jobs.

This one remote job as a multimedia programmer requires you to reprogram documents from flash to HTML. For this job you need to be proficient with HTML, CSS, and Javascript; have +2 years of programming experience, and have the ability to learn new languages.

There’s another job as a motion graphics designer in Weston, FL for Bang Energy. If you are into energy drinks and high performance drinks, then you’ll like this one. This job is entails you to create animated and video artwork for social media, it includes movie clips, some photoshop, illustrator and premier pro. Your responsible for working with art directors, designers and developers, generate new ideas, be organized and follow deadlines. This job requires you to have a bachelors degree in motion design or any design field, you need to have +2 years of experience, You must be able to multitask in a face paced environment, be a team player and have high attention to detail. Their benefits include health, dental and vision insurance and they offer tuition reimbursement.

Here’s another remote job as an Instructional designer for Tresta, a communication service in South Florida to help businesses move away from landlines. This job wants you to develop employee learning programs in alignment with organizational goals and training needed. You must utilize resources to ensure course content and training curriculum contains accurate information, understand various learning principles and employ a variety of multimedia to ensure maximum retention and comprehension, conduct assessments need to analyze and identify new developmental needs and recommend training methods accordingly. For this job you are required to have a bachelors degree along with +2 years of experience. The perks of this job is that you get:

  • To work from home
  • Competitive pay
  • 401K
  • Wellness initiatives
  • Health, dental, and vision coverage

Communications Coordinator at Broward college. Under limited supervision this position assists in executing strategies developed by the communications and community relations department. For this job you will need at least a bachelors degree. Your daily essential functions include.

  • Writing speaking points and blogs.
  • Builds and fosters collaborative relationships with other departments.
  • Pitch stories for distribution/publication. Contributes photos and stories to websites and publications. Encourage media participation, promotes spokespersons and arrange media interviews.

And much more responsibilities.

And last one I’ll be talking about is a multimedia designer for Nations Benefits. Your task is to deliver compelling, clean, modern digital print creative that clearly communicates the brand and effectively engages the audiences. You must create visually appealing and technically accurate/appropriate designs while adhering to strict deadlines. You must have a minimum of three years of experience in multimedia design, including but not limited to, producing/shooting/editing photography and videos, you must be extremely proficient in adobe creative suite, and they also prefer you to have excellent customer service skills as well. The offer the same health benefits and paid time off like the other jobs.

So these are the jobs for multimedia designers. Now be a team player and make some movies.

How to study for ACA tests

If you’re “in learning” like I am then you probably have to take these nerve shattering things they call “tests”. And if there’s anything I know about them, it’s that they suck. But there are a few ways you can prepare for these kinds of tests.

Videos

There are numerous types of videos for you to use for testing. Watch the tutorials on sites like, Linkedin learning, or the sites youtubers keep promoting like skillshare, or you can even look up youtube videos that teach you how to do things if whatever the schools provide aren’t working.

Practicing

Practice doing the the stuff you see them do. Don’t just watch the videos in the hopes that you’ll understand it, because they aren’t that simple. They’re really not. Just watch and do the stuff after or while you watch it. The term practice makes perfect exists for a reason.

There really isn’t much no know about how to study for this kind of test because you really need to just practice the stuff that they’re going to test you on. I do this alot and I passed the certification test easily. Now I did do this before so photoshop wasn’t hard for me to certify in, but this is the best way for you to study for this.

Brand designs

Business cards mock-up

Let’s talk about Brand guides for a moment. According to 99designs.com what a brand guide (brand styled guide) is a rule set that explains how an organization is supposed to present itself. From how it’s supposed to be to what it’s not supposed to be, in terms of logos, colors, titles, fonts, photography, and even mission. The brand guide is THE guide as to how-to-brand the right way, because without it the brand has no identity. No guide, no direction, hence why it’s called a brand GUIDE.

How to brand guide

There are a few key components to a brand guide.

  • Mission/vision: This mission is why your company exists and the vision statement to where you want the company to go.
  • Target audience: Who do you want to attract? Who are the customers and why do they need you? And what can your brand do to solve their problems? This is what your brand has to do for your audience. Note this: remember, it can’t please everyone so make it so that you can please as many as you can.
  • Personality: Describe your brand. 99designs.com suggests to try listing three to five adjectives describing what it is. (And to also list what it is not.)
  • Core values: What are the guiding principles for your teams decisions and actions. Make it memorable so your team can stay on brand easily.
The logo for my company

When I was doing a brand guide I included the colors and title and logos and ect. The design for this involves the wordmark being made out of the agency FB type font, and the “B” in blackhat to look like a lock to symbolize the security that our company provides.

Have a document shredder to dispose of documents (made with photoshop)

The best tool for designing mockups would be illustrator for designing logos and photoshop for editing any photography for your company. Though I have to say using illustrator was hard for me because I’m more of a stranger to it than photoshop, but once I actually knew what the hell I was doing, I managed to get it. It’s all a matter of getting your foothold and then once you start, there will always be the finish line.

So now that you know how to brand guide, and now that you know how to brand guide there should be nothing standing your way to make your company flourish.

letterhead mockup made in illustrator, edited in photoshop.

SO GO MAKE IT.

Deep into InDesign

Now we’re gonna go deep into InDesign. Lets learn about some really good tools and even learn about new things about new extensions.

Pre-Flight

Preflight checklist

Pre-Flight is the ritualistic inspection you absolutely must perform to ensure that your aircraft is airworthy. This includes checking the air pressure gauges, manifold pressure gauges, pitot head check the ailerons, and sump the fuel.

But we’re not talking about that preflight. Preflight for indesign involves performing quality checks for documents before handing them off to clients. The preflight panel warns you of any problems that can prevent a document or book from printing or outputting as desired, whether it is overset text, missing files of any kind, or low resolution images. To use the preflight first go to the windows panel -> then output -> then preflight, if the icon is green then no errors should be detected, if its red then there are.

Cover/poster designing

In the modern days ebooks are now being read instead of print (print still exists of course). In design can be used to create covers for books, posters and newspapers.

EPUB

For ebooks the file extension it uses is the epub format which is used to package content for ebooks carrying the necessary files and images and is more supported than PDF files.

Tools

Some tools to keep note of are the text tool, which is exactly what you think it is. You use it to add text to your covers. The hand tool which as you can guess move the artboard around. The shape tools, which if you know anything about illustrator you can build shapes for your designs. The pen tool which draws shapes just like in illustrator as well. And the scissors tool which can cut lines into new segments. These are tools that greatly help you when using indesign.

How to convert from RGB to CMYK

As we’ve went over before when printing anything, the color mode for print is CMYK and not RGB. Some programs can do this for you when you go straight to printing and you can set it to CMYK from there. But here’s how you do it before hand.

First you pull up an image on photoshop.

Then you go into edit -> convert to profile color then it will give you the option to change it to CMYK automatically depending on the printer you use.

Then as you can see the color mode changed from RGB to CMYK.

(This picture was made after converting the last image which is why the blue circle looks duller, product of converting) To print go to the file tab-> print, and you’ll see all these options. Where it says document profile it should say web coated (which is basically CMYK). Once you are done setting up hit print.

It works similarly in other programs such as illustrator as well but the placements are somewhat different.

In illustrator you need to go to file for this one.

In file find “document color mode” and choose CMYK instead.

And now it should say CMYK instead of RGB.

There are different programs that does this differently but the ways that they do this isn’t hard. Just go to file (mostly) and find the settings that convert to CMYK, you can even do it right before you print. Also if you see some type of warning telling you that the color isn’t supported for CMYK then click on the warning and it should set it to a similar but more well supported color pallet.

That’s basically it, it’s that simple. Now get out there and print something nice.

More Multimedia job information

Photo by You X Ventures on Unsplash

I’ve talked about jobs for multimedia before but now we’re gonna get into a bit more detail about the jobs and “the big moneys” that you can make.

In the last post I’ve said that you can work as a

  • digital camera operator
  • sound engineering technician
  • game designer
  • film/audio editor
  • multimedia artist

But other jobs include, but aren’t limited to

  • Game tester
  • photographer
  • installation artist
  • animator
  • game programmer

and much more might be introduced in the future.

Some jobs on sites like indeed, and monster include but not limited to

  • eLearning content developer
  • experienced sign maker
  • multimedia and digital specialist
  • part-time video production technician
  • freelance editors

These jobs can be as small as $11 per hour up to $117,606 per year depending on the job.

Using sites like this is easy.

All you gotta do is use the left panel and check/uncheck what you’re looking for. Whether you want to get paid more, you want something closer to home or you want a more fulfilling job. There are of course search engines in these sites if you want something specific, but in order to really get something out of this it’s best to utilize all of the search capabilities, the search and the side bar.

But the thing with these jobs is that they do have requirements.

Certain jobs will require a certain education or will require you to do certain things or to just plain work your way to the top. Some are full-time some are part-time and others are just free-lance. One of these is a multimedia production manager in Miami and for this you need

  • To have an ambitious attitude toward finding stories that would be important to tell the company and it’s customers.
  • Assist in producing all video productions, in studio and on location.
  • Assist and contribute in script writing proccess.

The requirements for this job include but not limited to

  • A college degree in film/video studies production
  • +2 year of video production experience
  • Must provide demo reel of previous qualifications
  • general knowledge of adobe creative cloud
  • microsoft office
  • knowledge of video cameras and basics
  • general knowledge of lighting for video production.

If you are interested in jobs like this you can check out zip-recruiter, indeed, monster or any job posting site like it. If you need to you can post your own job listings for your company as well; just go to the employers section, and post your job and wait for applicants.

Well now you know a little bit more about multimedia jobs and what you need to do for them. Now you can do what my parents said and GET A JOB.

Editing with Photoshop: Rasters, Vectors, Destructive/Non-Destructive Edits

So when it comes to creating and editing in photoshop there’s so much you can do in it. No that’s not a “sky’s the limit” sentence, I literally mean there’s a lot of things you can do in this program, so much so that photoshop has different ways to edit. Think about this, you pull up an image and you want to change the color or make it darker/lighter, you can just change the hue/saturation or set the black&white tone but that will change the whole image. That is called destructive editing when you do that, you change the whole image and you can’t do much with it except undo. This happens because you save directly over the original image and now you can’t make changes to the original image.

Man you screwed up now, so what can you do about it?

Non-destructive editing (as seen as above) can save your life. This form of editing is what you can use to make changes to your picture without completely changing it. Applying a layer mask is a way of adding changes with out the change, basically “touching” it. Think of it as an edit “screen over the picture”. Use non-destructive editing for bigger, more complicated edits.

Vectors and rasterized graphics

Vector design, composed of shapes

Rasterized graphics (or bitmap images) are made by a map of bits within a rectangular grid of pixels or dots. Vector images are composed of lines, shapes, and other graphic image components stored in a format that incorporates geometric formulas for rendering image elements.

Vectors are math based and defined by paths so that they don’t look pixelated when scaled too much. These things are used best for logos.

The reason why you would rasterize a vector layer in photoshop is to properly use tools to edit images as some editing directions require you to rasterize, converting your images to pixels. This will happen when you want to do edits like change color using the paint bucket tool; you can still change the vector color using the properties tab but you still might need to convert for other editor tools.

Again there are a multitude of ways to use photoshop but the best way to use it is the way that you know how, and to avoid less heartache is by using non-destructive methods for serious editing.

And that is how I photoshop, how do you photoshop?