If you’re “in learning” like I am then you probably have to take these nerve shattering things they call “tests”. And if there’s anything I know about them, it’s that they suck. But there are a few ways you can prepare for these kinds of tests.
Videos
There are numerous types of videos for you to use for testing. Watch the tutorials on sites like, Linkedin learning, or the sites youtubers keep promoting like skillshare, or you can even look up youtube videos that teach you how to do things if whatever the schools provide aren’t working.
Practicing
Practice doing the the stuff you see them do. Don’t just watch the videos in the hopes that you’ll understand it, because they aren’t that simple. They’re really not. Just watch and do the stuff after or while you watch it. The term practice makes perfect exists for a reason.
There really isn’t much no know about how to study for this kind of test because you really need to just practice the stuff that they’re going to test you on. I do this alot and I passed the certification test easily. Now I did do this before so photoshop wasn’t hard for me to certify in, but this is the best way for you to study for this.
When it comes to fonts there are many different types than just Ariel, Times New Roman, and…
From mytimes.com
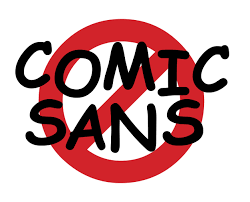
We ain’t using this anymore. Don’t use this. EVER. There is nothing less professional than comic sans. So we’re going to talk about fonts and how to do them right.
Open Type Fonts
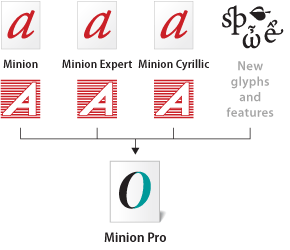
from adobe.com
Open type fonts are cross platform font file formats that were developed by adobe and microsoft. The main benefits of open type fonts are it’s cross-platform compatibility (so they can work on both mac and windows pcs), and its ability to support widely expanded character sets and layout features, which provide richer linguistic support and advanced typographic control. Feature-rich adobe open-type fonts can be distinguished by the word “pro”, which is a part of the font name. Open type fonts can be installed and used alongside Postscript Type 1 and TrueType fonts.
Open type fonts significantly simplifies font management and the publishing workflow by ensuring that all of the required glyphs for a document are contained in one cross-platform font file throughout the workflow. Open-type fonts may contain more than 65,000 glyphs, which allow a single font file to contain many non-standard glyphs, such as old-style figures, true small capitals, fractions, swatches, superiors, inferiors, titling letters, contextual, and stylistic alternates, and full range of ligatures.
Postscript Fonts
from: fonts.com
Postscript fonts are generally two main components to Postscript Typefaces. The first file contains the actual Post script typeface itself and is often called the “binary” or “printer file” file. The second file contains the typeface’s complete name, the spacing characteristics and information to help the computer display the typeface on the screen and for printing the font. Both files need to be submitted.
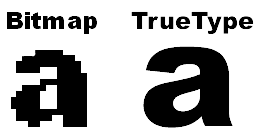
Truetype Fonts
from: computer.howstuffworks.com
Truetype fonts only require one file to be submitted for each instance of the font. For example, a different file is needed for normal, bold, italic, etc. Truetype typefaces are generally intended for business office use and can be less reliable for publishing applications. Only use Truetype typefaces when the typeface is unavailable in Postscript format.
And now you know a little more about fonts, and how they work. Now go type a good story and remember, DONT USE COMIC SANS.
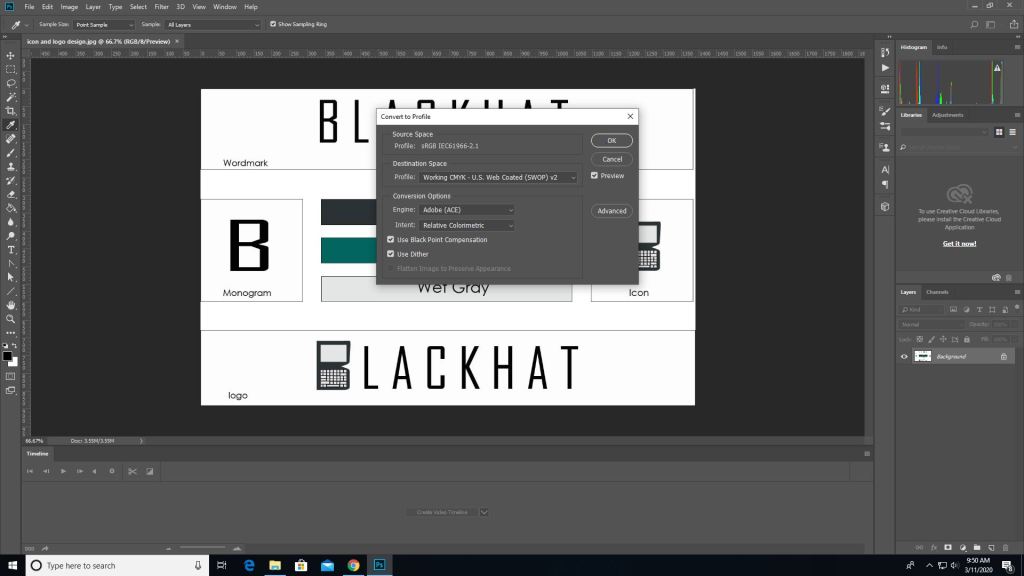
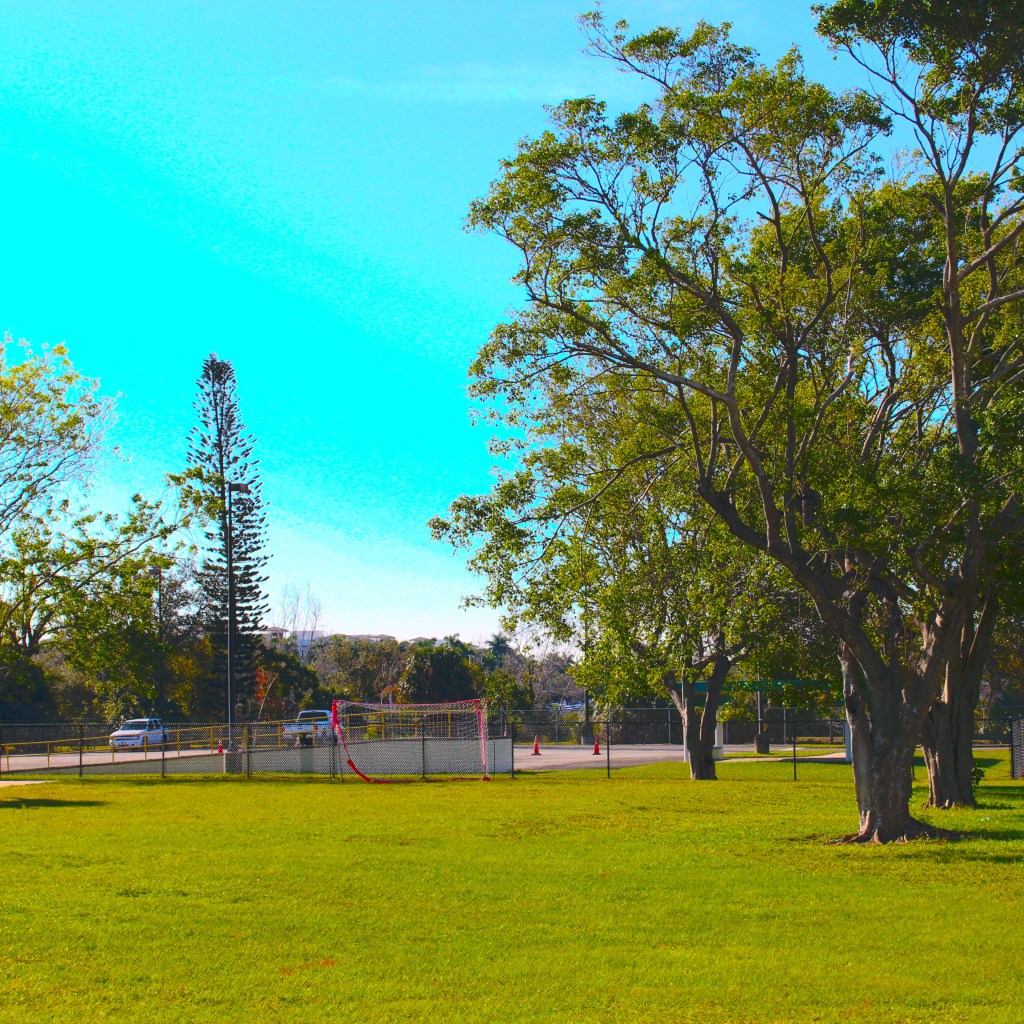
As we’ve went over before when printing anything, the color mode for print is CMYK and not RGB. Some programs can do this for you when you go straight to printing and you can set it to CMYK from there. But here’s how you do it before hand.
First you pull up an image on photoshop.
Then you go into edit -> convert to profile color then it will give you the option to change it to CMYK automatically depending on the printer you use.
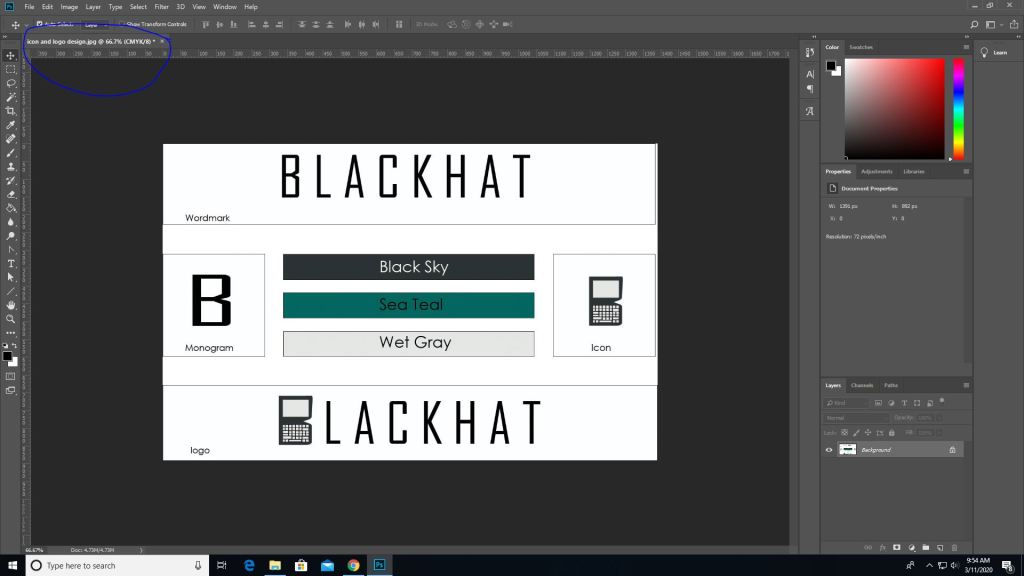
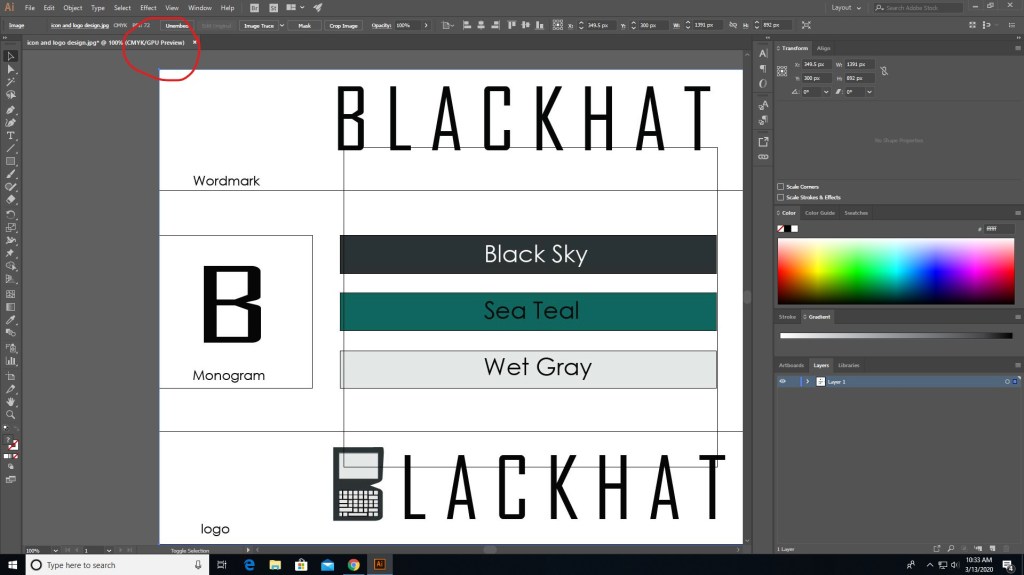
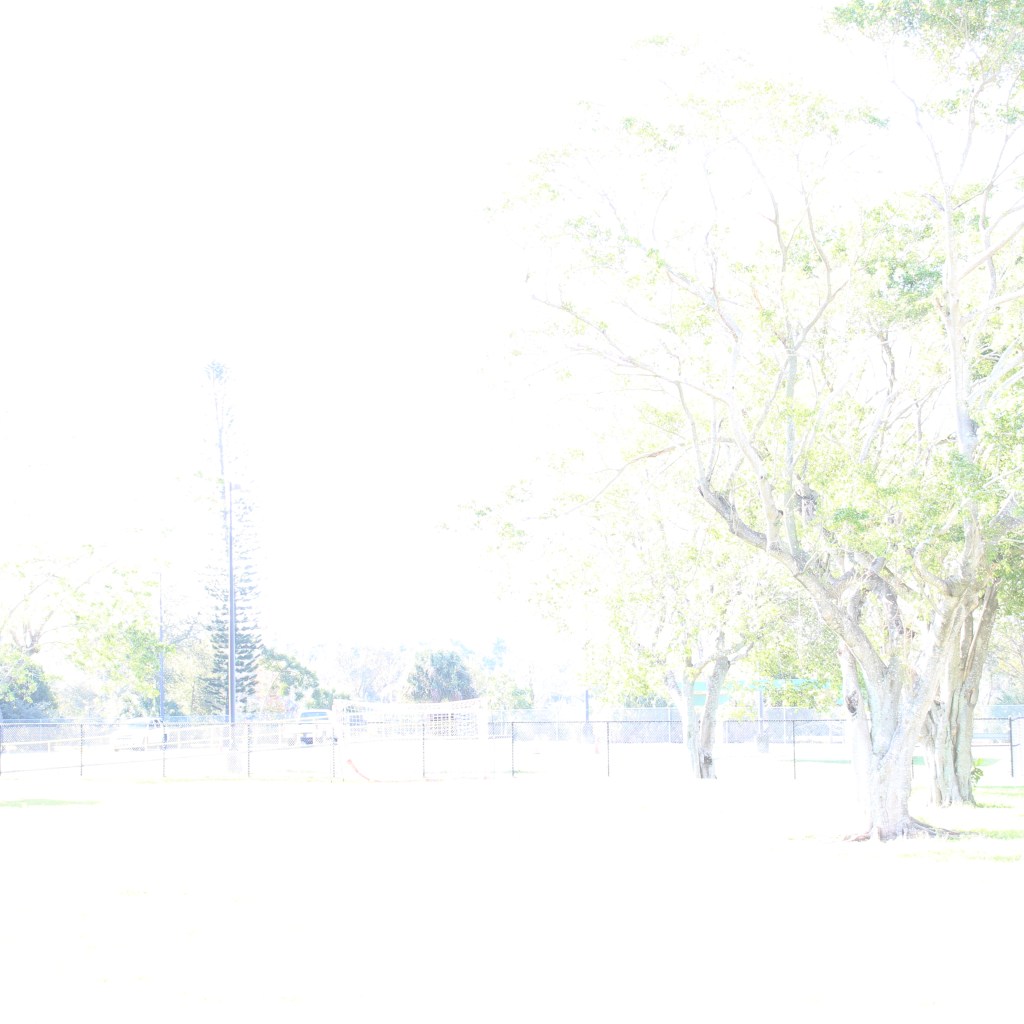
Then as you can see the color mode changed from RGB to CMYK.
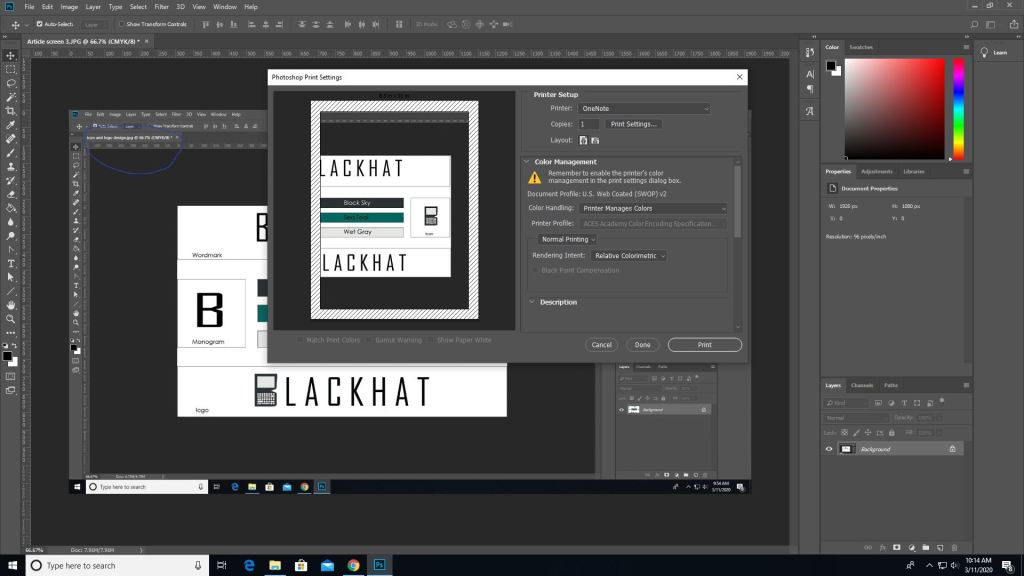
(This picture was made after converting the last image which is why the blue circle looks duller, product of converting) To print go to the file tab-> print, and you’ll see all these options. Where it says document profile it should say web coated (which is basically CMYK). Once you are done setting up hit print.
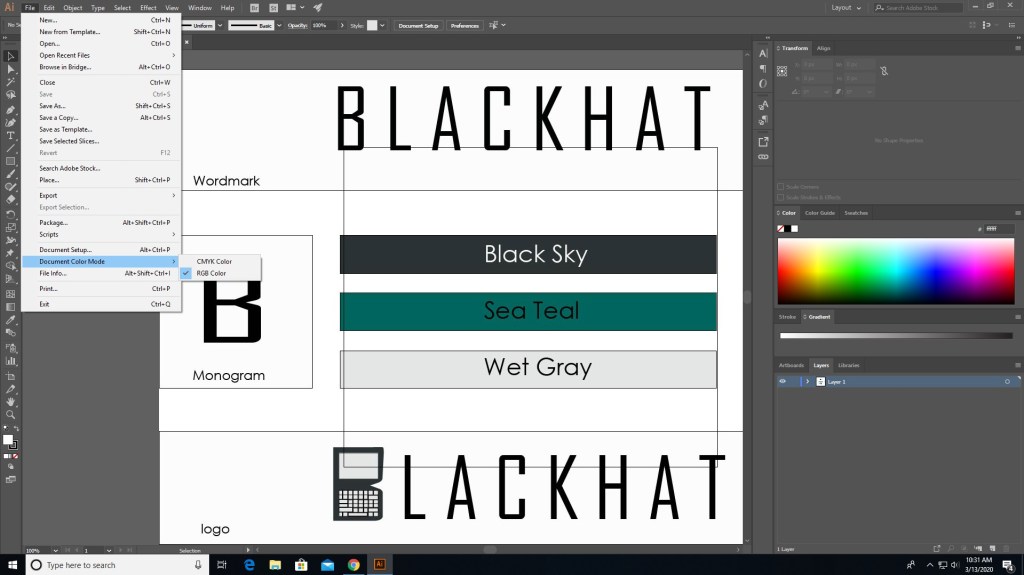
It works similarly in other programs such as illustrator as well but the placements are somewhat different.
In illustrator you need to go to file for this one.
In file find “document color mode” and choose CMYK instead.
And now it should say CMYK instead of RGB.
There are different programs that does this differently but the ways that they do this isn’t hard. Just go to file (mostly) and find the settings that convert to CMYK, you can even do it right before you print. Also if you see some type of warning telling you that the color isn’t supported for CMYK then click on the warning and it should set it to a similar but more well supported color pallet.
That’s basically it, it’s that simple. Now get out there and print something nice.
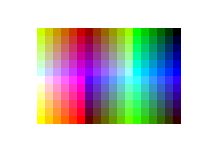
When it comes to designing, something to keep in mind are colors. Not which color you should use for your clothing design website, I mean which colors are safe for the web.
When it comes to the web, colors are made in RGB (reds, greens, and blues), and print (on paper) is made of CMYK colors (cyans, magentas, yellows, and blacks… yeah its black).
Web colors are specified as RGB triplet or hexadecimal format. Hexadecimal color codes are specified with notation using a leading # sign (not a hashtag).
In the mid-90s, many displays were only capable of displaying 216 colors due to the limited hardware.
Looks like windows 95 right? It basically is.
Nowadays our computers are capable of at least 256. Approximately 10% of the newest computers can only use 256 colors (8-bit). Others are equipped with 64 thousand colors (16-bit) and the highest quality deliver 16.7 million (24-bit).
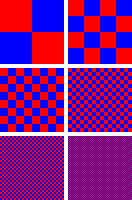
When it comes to web safe colors, one thing to keep in mind is dithering. If your computer doesn’t have all the colors available for the website then it will try to simulate the colors by mixing two or more available colors from the pallet to give it the illusion of the color making it look like it has spots.
ditheringnon-dithering
Windows 95 stuff that is.
Spot colors are CMYK colors (printing colors), and are generated by ink. CMYK does a similar proccess of mixing colors (solid) together to generate another; like cyan and magenta to make a blue or purple, or cyan and yellow to make greens. Today they are used for print, and are used by various printing companies, such as pantone. There’s really nothing that complex about CMYK, only that it’s used just for printing and only CMYK is what prints. You can’t use RGB to print unless you have an LED based RGB printer. You can preview what your picture looks like when you edit it in photoshop by looking in the previews before you print.
And now you know a little more about colors and the history behind them.
I’ve talked about jobs for multimedia before but now we’re gonna get into a bit more detail about the jobs and “the big moneys” that you can make.
In the last post I’ve said that you can work as a
digital camera operator
sound engineering technician
game designer
film/audio editor
multimedia artist
But other jobs include, but aren’t limited to
Game tester
photographer
installation artist
animator
game programmer
and much more might be introduced in the future.
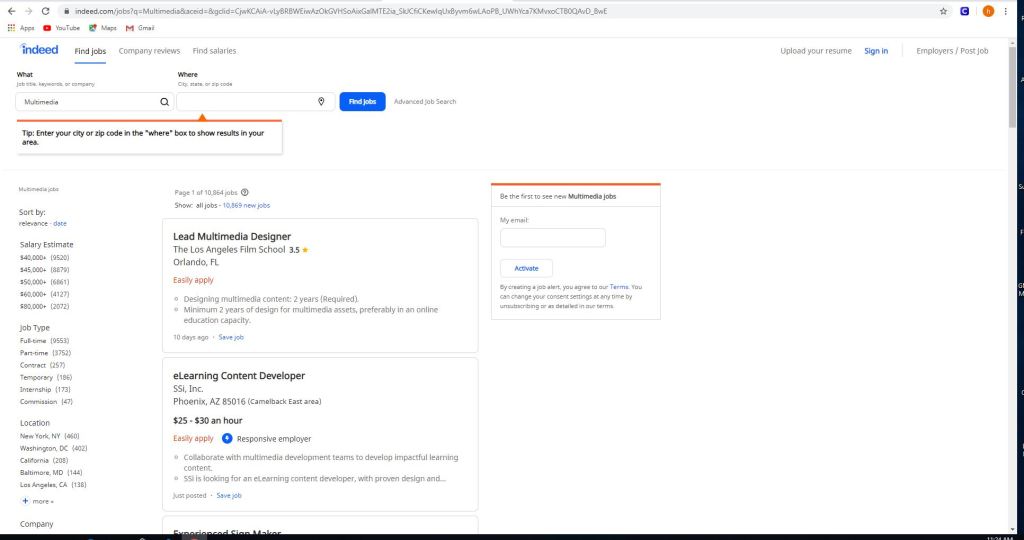
Some jobs on sites like indeed, and monster include but not limited to
eLearning content developer
experienced sign maker
multimedia and digital specialist
part-time video production technician
freelance editors
These jobs can be as small as $11 per hour up to $117,606 per year depending on the job.
Using sites like this is easy.
All you gotta do is use the left panel and check/uncheck what you’re looking for. Whether you want to get paid more, you want something closer to home or you want a more fulfilling job. There are of course search engines in these sites if you want something specific, but in order to really get something out of this it’s best to utilize all of the search capabilities, the search and the side bar.
But the thing with these jobs is that they do have requirements.
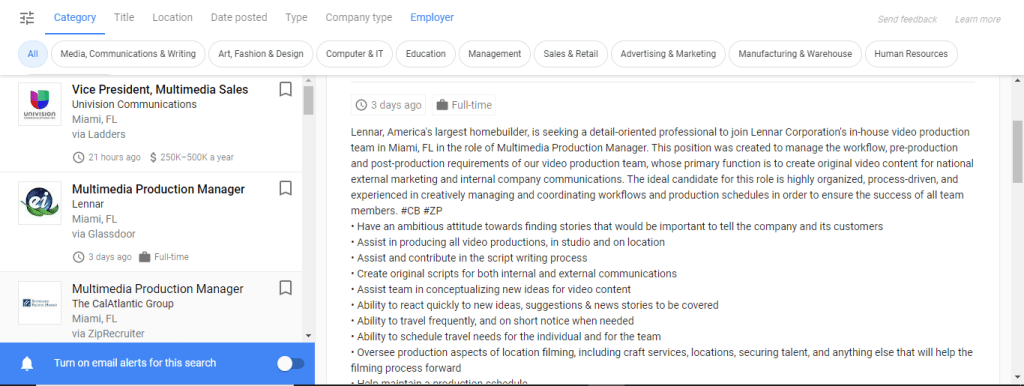
Certain jobs will require a certain education or will require you to do certain things or to just plain work your way to the top. Some are full-time some are part-time and others are just free-lance. One of these is a multimedia production manager in Miami and for this you need
To have an ambitious attitude toward finding stories that would be important to tell the company and it’s customers.
Assist in producing all video productions, in studio and on location.
Assist and contribute in script writing proccess.
The requirements for this job include but not limited to
A college degree in film/video studies production
+2 year of video production experience
Must provide demo reel of previous qualifications
general knowledge of adobe creative cloud
microsoft office
knowledge of video cameras and basics
general knowledge of lighting for video production.
If you are interested in jobs like this you can check out zip-recruiter, indeed, monster or any job posting site like it. If you need to you can post your own job listings for your company as well; just go to the employers section, and post your job and wait for applicants.
Well now you know a little bit more about multimedia jobs and what you need to do for them. Now you can do what my parents said and GET A JOB.
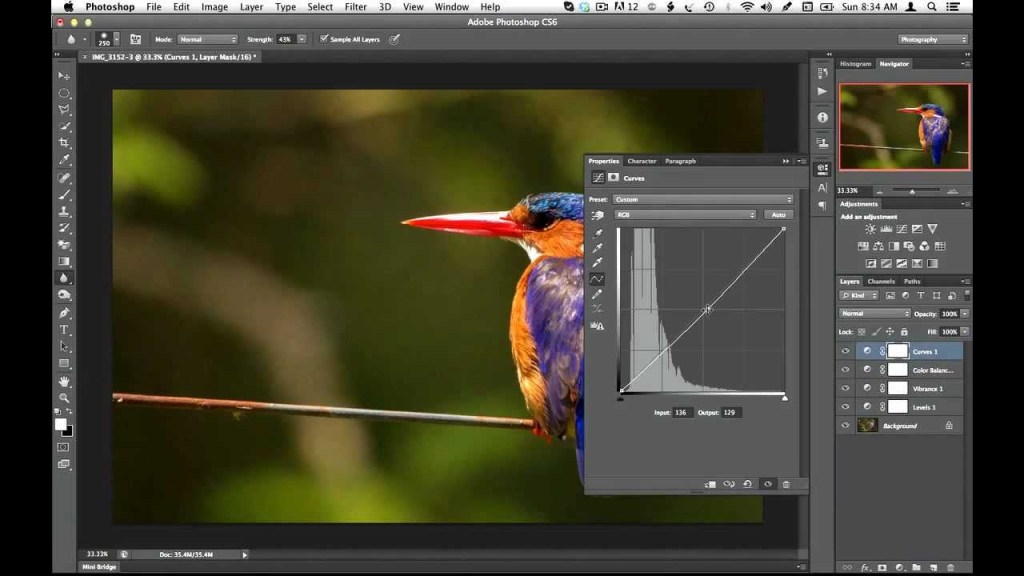
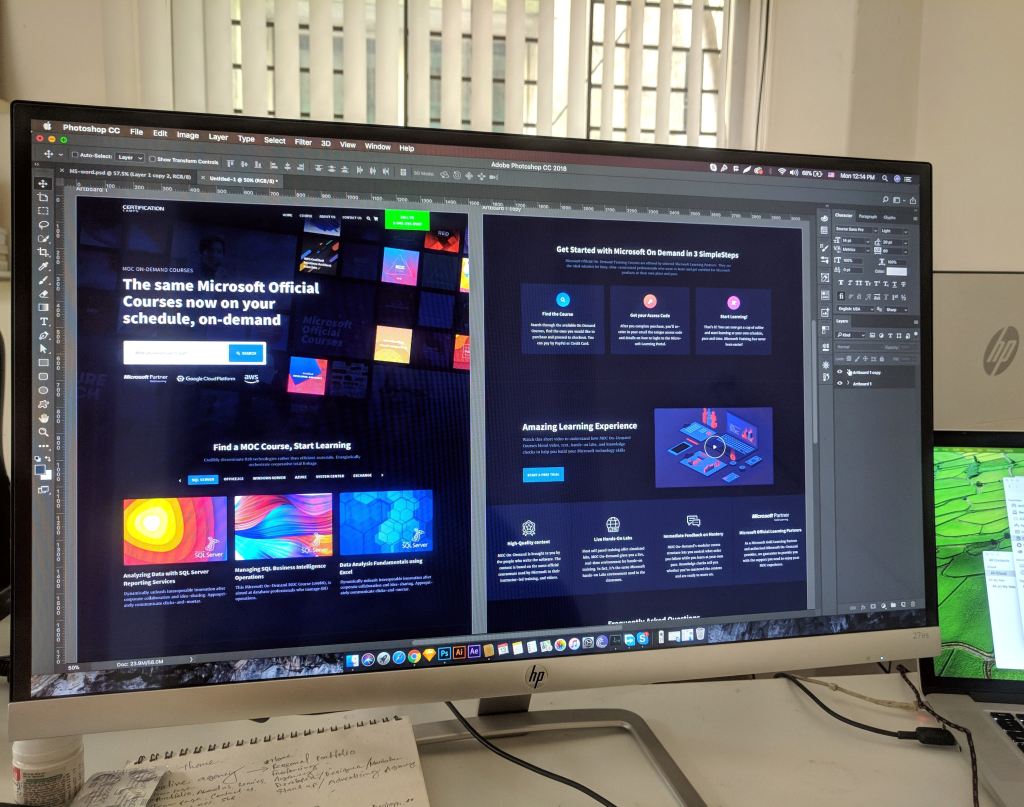
So when it comes to creating and editing in photoshop there’s so much you can do in it. No that’s not a “sky’s the limit” sentence, I literally mean there’s a lot of things you can do in this program, so much so that photoshop has different ways to edit. Think about this, you pull up an image and you want to change the color or make it darker/lighter, you can just change the hue/saturation or set the black&white tone but that will change the whole image. That is called destructive editing when you do that, you change the whole image and you can’t do much with it except undo. This happens because you save directly over the original image and now you can’t make changes to the original image.
Man you screwed up now, so what can you do about it?
Non-destructive editing (as seen as above) can save your life. This form of editing is what you can use to make changes to your picture without completely changing it. Applying a layer mask is a way of adding changes with out the change, basically “touching” it. Think of it as an edit “screen over the picture”. Use non-destructive editing for bigger, more complicated edits.
Vectors and rasterized graphics
Vector design, composed of shapes
Rasterized graphics (or bitmap images) are made by a map of bits within a rectangular grid of pixels or dots. Vector images are composed of lines, shapes, and other graphic image components stored in a format that incorporates geometric formulas for rendering image elements.
Vectors are math based and defined by paths so that they don’t look pixelated when scaled too much. These things are used best for logos.
The reason why you would rasterize a vector layer in photoshop is to properly use tools to edit images as some editing directions require you to rasterize, converting your images to pixels. This will happen when you want to do edits like change color using the paint bucket tool; you can still change the vector color using the properties tab but you still might need to convert for other editor tools.
Again there are a multitude of ways to use photoshop but the best way to use it is the way that you know how, and to avoid less heartache is by using non-destructive methods for serious editing.
And that is how I photoshop, how do you photoshop?
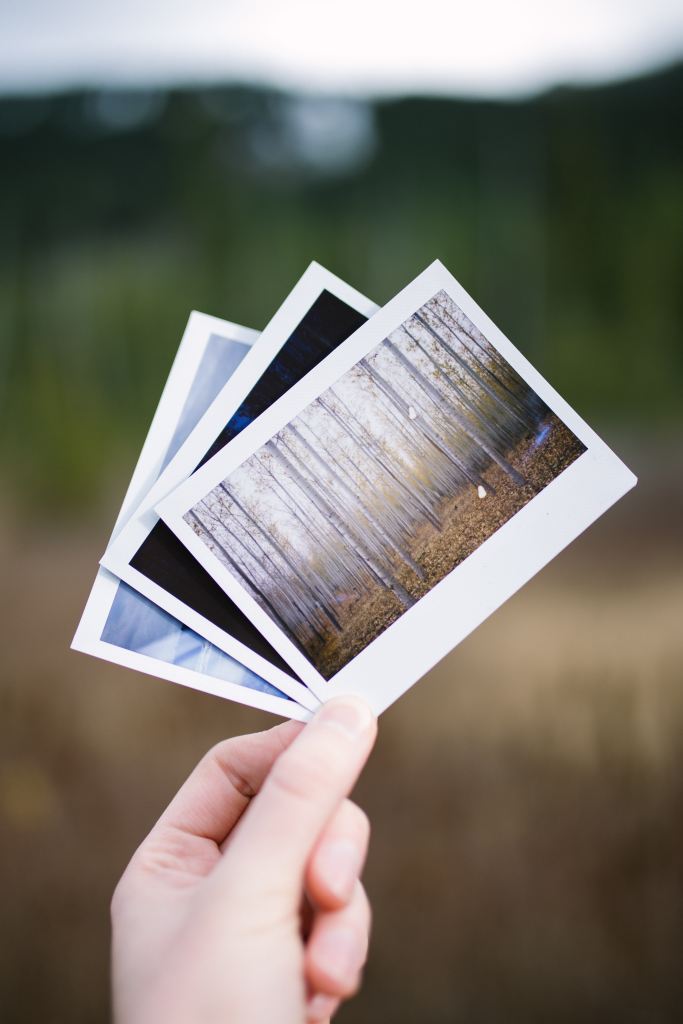
Advanced photography includes many things like; panorama, HDR, and professional grade black/white photos. Wait, HDR, panorama. What even is!? Fear not, we can find this out together.
HDR
HDR stands for High Dynamic Range, the dynamic range is difference between the lightest light and the darkest dark in a photo. In a photo, if your subject exceeds the dynamic range, either the highlights can wash away the whites, or the darks can turn into black masses. That’s what HDR technology is used for, to turn the photo from under/overexposed to the higher dynamic photos. How it works is basically combining two (or even nine) photos together in a software with HDR tools to make one great looking picture. Now the pictures need to be the same exact thing with varying exposure. No moving objects (including the camera, so it’s best to use a tripod), then blend the photos together with the software.
UnderexposedGood exposuretoo over exposed
Which will get this upon combination.
Better
Panoramic
Panorama is the wide picture. It’s one thing to take out your phone and take a picture with the panorama setting on (like some casual tourist). But to look professional here’s how you do it with a professional camera.
For a good panorama it’s best to use 4-5 images depending on space, but they need to be full-length so the best way to do this would be to look for key objects. Use the rule of thirds for this. Get a picture, look to the right of the grid for any key objects, and move the camera to the other side with the key item from the right to a similar spot on the left. Repeat this a couple more times and merge these photos in photoshop using the panoramic option and you should be able to make a wide looking picture that looks like this.
Black and white photos
Get your phone take a picture and set it to black and white, right? Nope. How about send it to photoshop, and drop the hue/saturation? Yes, but there’s more to it than that. When it comes to black and white photos there’s more to it than just taking a picture and setting it to black and white, there’s also light factor and tone balancing in order to get what you want to stand out. Monochrome photography uses black and white (and other colors like cyan, or sepia) for artistic creation.
Well that’s a few of the things to use when it comes to professional photography. Now get out there and start warping space with your image capturing dodads.
So you want to take pictures? What kind? That is the million dollar question. When it comes to photography, there are certain variables to consider when doing any photo. Which are…
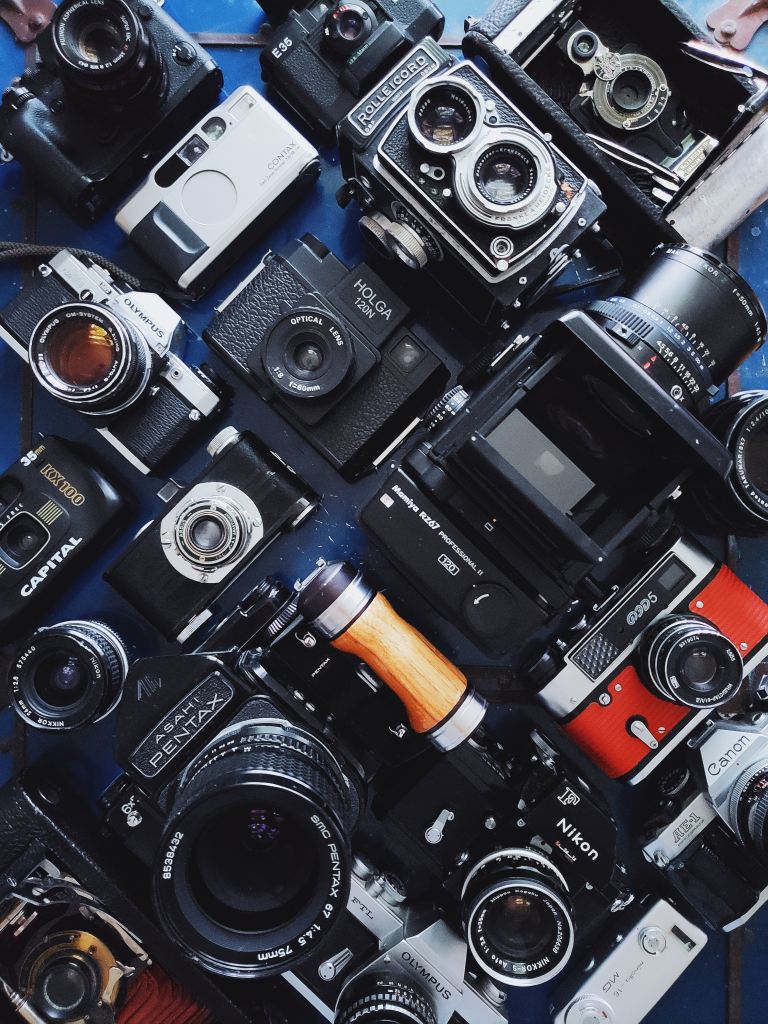
When it comes to photography there are many different cameras at your disposal. DSLR (digital single lens reflex) cameras, point-and-shoot cameras, camcorders, and… cell phones.
DSLR cameras are the ones that are mostly used in the professional world. These cameras exist in a wide variety with inter-changeable lenses for different shots. Inside the body is a mirror that reflects light coming in from lens up into an optical viewfinder, by way of prisms (for higher end models), or a series of mirrors (in lower end models). Which is how you can see what you’re shooting through the lens. When you press the shutter button the mirror flips out the way and incoming light shoots through to the image sensor. The shots are done in real-time, so unlike mirror-less cameras, which are the point-and-shoot type, there is no lag because the camera is designed not to have a sensor transfer data elsewhere on the camera. However because of this you wont be able to preview your image settings through the optical viewfinder like in mirrorless cameras.
What else these cameras have that others don’t is…
Can take in more light for those dark areas.
Faster auto-focusing technology.
And interchangeable lenses
Speaking of interchangeable lenses, these cameras also use other accessories like…
tripods, for stability
a strap
SD cards, for memory storage
filters for different areas
blowers/rags to remove dust
Mirrorless cameras do the same thing as DSLRs (which is take pictures). However they are very different in design. Both types can show the scenes through camera lenses as you compose the picture, but the mirrorless cameras use the live view capture by the sensor to create an electronic viewfinder image. The electronic viewfinder is sharper and more responsive than the optical viewfinder and can offer different customization options that you can’t get in an optical viewfinder. These vary in between cameras but include, the ability to show advanced exposure aids like histogram and waveform monitor right in the viewfinder. Mirrorless cameras have improved auto focusing and can balance out more features like eye detection, but DSLR still lead with its real time eye detection tracking.
Although DSLR cameras still surpass mirrorless ones with battery life in the near future they will improve them overtime. But until then DSLR wins that round.
Camcorders, basically combines video cameras and video cassette recorders. The earliest camcorders were recording analog signals and were tape-based, and in 2006 it was replaced with digital recording with SD cards and internal flash memory, and micro DVD. they have a built-in microphone and thus can take crisper audio.
Smart phones…
Basically for those who aren’t serious about photography, just saying.
The best camera phones are the google-pixel-4’s, Huawei P30 pro, and the Samsung galaxy S10 pro. The google pixel has a phase detection auto-focus, and dual-pixel phase detection auto-focus, have 64/128 GB of storage. While phones have settings and filters to give you the feeling of pro cameras, the best that they’re used for is… social media.
The exposure triangle is basically the foundation of a photo.
ISO
Aperture
Shutter speed
Also known as…
How much light exposure you need for the area you’re in?
low ISO, way under exposed
High ISO, way over exposed
Good enough
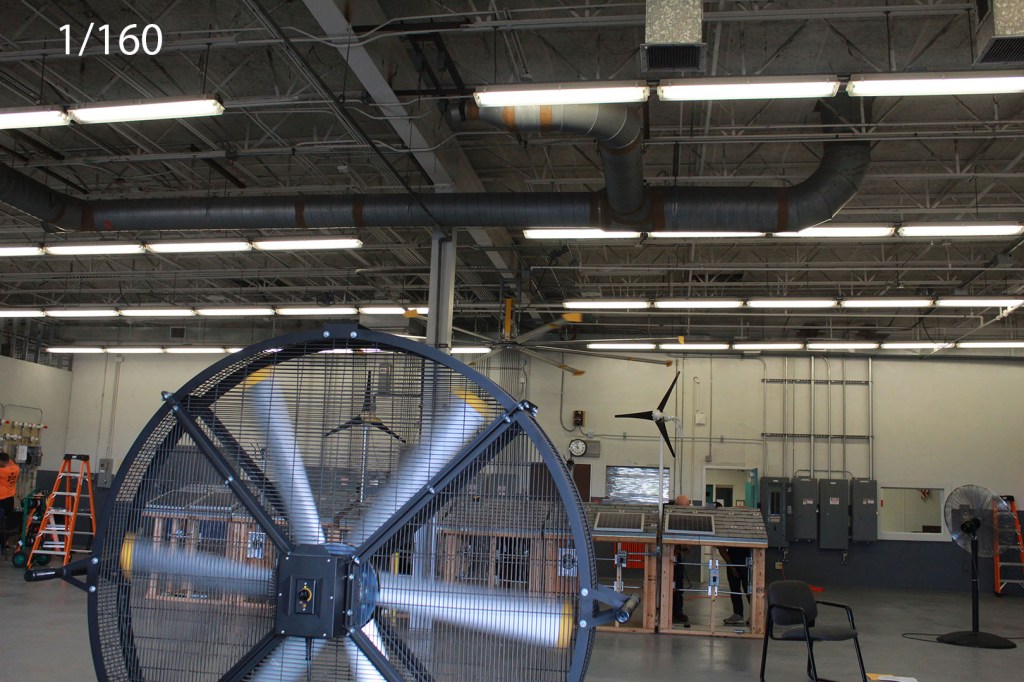
how blurry the background is
Can on focus but the extinguisher isn’t.Extinguisher is more visible
To ghostly moving objects
Moving fan
To a not so moving fan
While there is a wright and a wrong way of doing these things these different settings can do many other things. Just play with the different settings to get what you want.
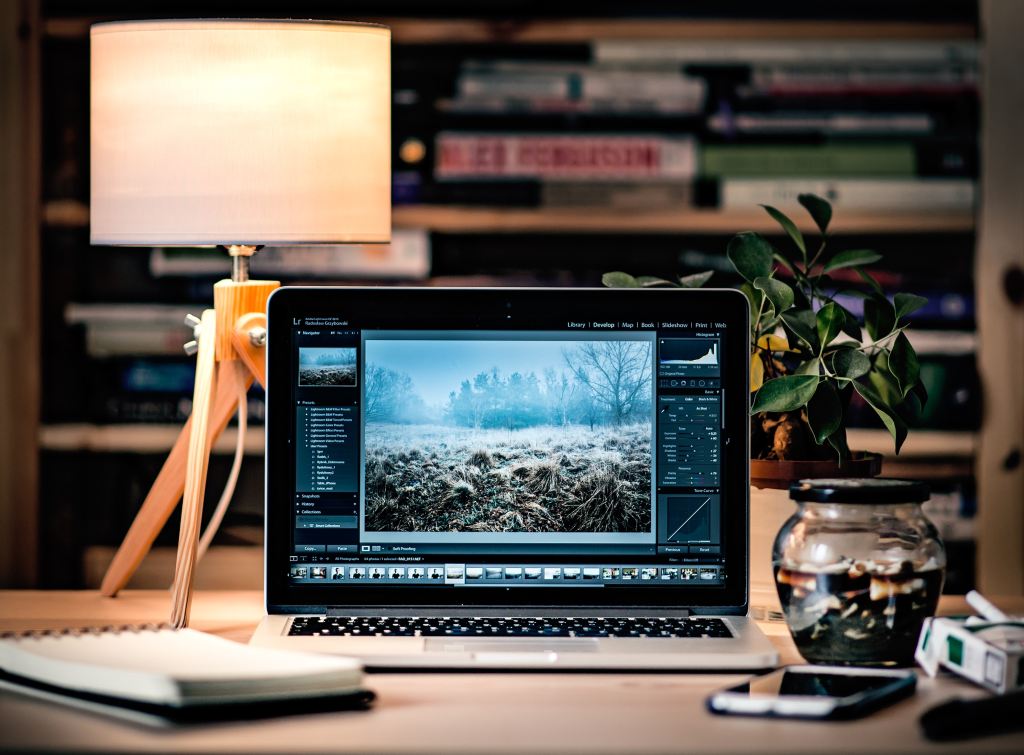
No I don’t mean the mud bricks, I mean the Adobe CC software. Adobe CC (which means Creative Cloud) is a service that can offer applications and services for editing photos, creating videos and animations, and even design websites.
One of the tools and applications used to edit photos in adobe cc is Photoshop. There are other applications for photo editing, such as photoshops desktop equivalent Lightroom classic, and a few cloud services like bridge and lightroom (modern). For now we’re looking at photoshop as an editor, although you can use bridge or lightroom to view your photos before working on them in photoshop but neither of them are necessary for it, but it’s still helpful to drag and drop your images in one of the programs to view them before editing them. In photoshop you can use various tools to basically touch up photos, or create something grander. One tool for example is “the spot healing brush tool (the band-aid looking tool)”, it works like a paintbrush to cover up anything like spots using the pixels that surround it. Basically, think of it as filling a hole with the surrounding mound of dirt (but not really).
Some other little shortcuts and do-dads to remember:
Undo: command (mac PC) + Z, ctrl (windows PC) + Z
Redo: Command+shift+Z, ctrl+shift+Z
Copy: command/ctrl+C
Paste: command/crtl+v
A few issues to note and how to fix them:
MacOS 10.15 catalina compatibility need photoshop 21.0 and 20.0.7, and sometimes when you save them as a copy it doesn’t append “copy”. To work around this just manually rename the image and add copy.
When working with cloud documents, you might have issues saving as a cloud document. To fix any issue just check to see if creative cloud needs an update.
When working on videos you can use photoshop, but there are other programs that specialize in video editing. Premier, after affects, and animate to name a few. Premier pro is a timeline based video editing app to edit movies, which was used in creating movies such as Deadpool, Gone girl, and Captain Abu Raed. After effects is used for creating visual effects for the movies, and animate is used to create vector based graphics for websites and T.V shows. If there are issues with the program
Such as:
Drop in (choppy) frames
audio drop out
No video during playback
Playback getting stuck when you hit the spacebar
If these issues occur
Ensure the file that you’re using
Update the video card driver: flawed video display card drivers can incorrectly display motion video and textures.
Temporarily switch to single display configuration.
For web designing the adobe software to use is dreamweaver and XD.
Dreamweaver uses both live view and a code editor with standard features such as syntax highlighting, code completion/collapsing, and more advanced features like real-time syntax checking, and code introspection for code hints.
Adobe XD is a vector based program used to make mobile and web apps and supports wireframing, you can even use it for your mobile device.
XD contains features like:
Repeat grid: for photos and lists
prototype and animation: create animated prototypes through linking art boards.
Voice design
Issues with the programs and how to fix them:
If the extension isn’t displayed on dreamweaver, close it out and install the extension.
If you have dreamweaver and cant install new updates for dreamweaver 12 and up, you need to install the latest extension manager for further extensions.
Also for extensions use .zxp files, and mxp files for manager CS.
So these are the Adobe programs used to for web designing, movie making, and photo editing.